Introduction
What is a Hydraulic Lifter?
| Component | Function | Common Failure Mode |
|---|---|---|
Outer body / barrel |
Houses internal components |
Scored bore from debris |
Plunger / piston |
Moves within body to take up lash |
Stuck from varnish or scoring |
Check ball / disc |
Holds oil under pressure |
Leaks from debris or wear |
Spring |
Returns plunger to extended position |
Fatigue or collapse |
How Hydraulic Lifters Fail
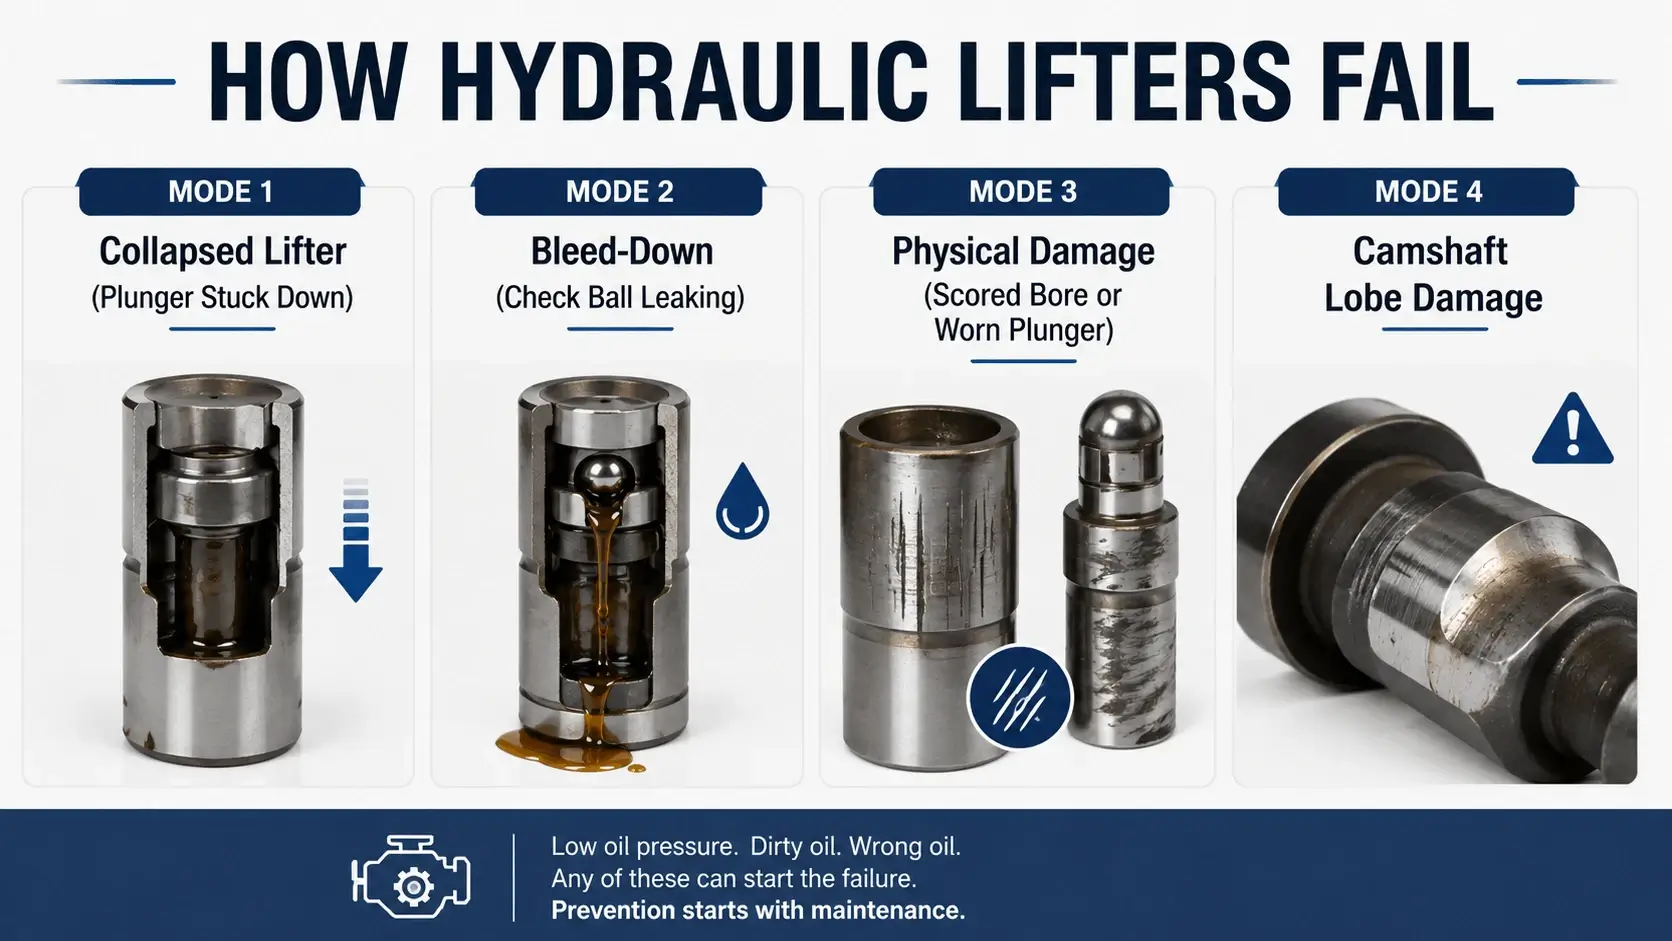
Lifters fail in predictable patterns. Recognizing the pattern speeds diagnosis. It also tells you whether repair is even possible.
Mode 1: Collapsed Lifter (Plunger Stuck Down)
The most common failure. The plunger binds in the retracted position. Oil cannot fill the high-pressure chamber. The lifter acts like a solid block with excessive lash. You hear a distinct tick that gets faster with RPM but does not go away.
Causes:
- Varnish buildup from extended oil change intervals
- Debris lodged between the plunger and the bore
- Corrosion from moisture in the oil
- Manufacturing defect (rare after break-in)
This mode has the best prognosis. If the plunger moves freely after cleaning, the lifter often works again.
Mode 2: Bleed-Down (Check Ball Leaking)
The check ball no longer seals properly. Oil leaks past it faster than the oil pump can supply. The lifter collapses momentarily at low RPM. Noise appears at idle but diminishes as engine speed increases.
Diagnosis requires a bleed-down test. Pump the plunger with a specialized fixture. Measure how long it holds pressure. A serviceable lifter holds for 20 to 30 seconds minimum. Anything less than 3 to 5 seconds indicates check ball or seat damage.
Mode 3: Physical Damage (Scored Bore or Worn Plunger)
Debris has scored the inner bore or worn the plunger diameter. Oil leaks around the plunger regardless of the check ball condition. This mode rarely responds to cleaning alone. Machining or replacement becomes necessary.
Mode 4: Camshaft Lobe Damage
Sometimes the lifter is fine. The cam lobe has worn flat. The lifter cannot follow the profile correctly. It pumps up and down excessively. This creates noise and eventual destruction. Replacing the lifter without addressing the cam wastes time and money.
Diagnostic Procedures
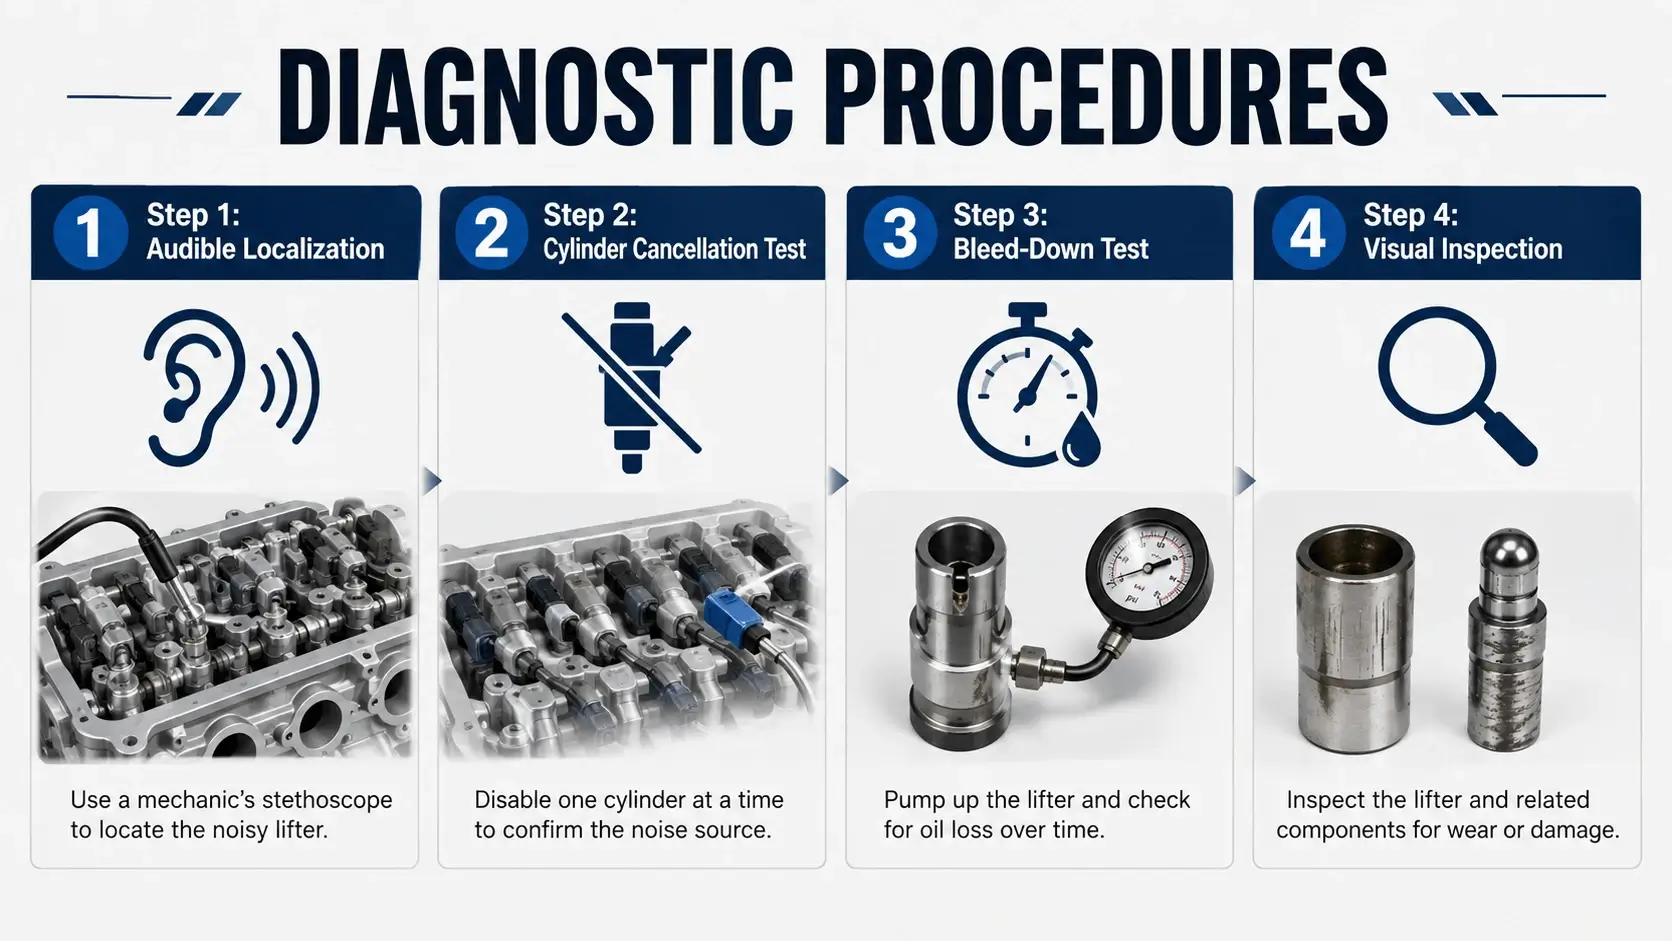
Proper diagnosis separates successful hydraulic lifter repair from wasted effort. Follow this sequence.
Step 1: Audible Localization
Start the engine cold. Listen with a mechanic’s stethoscope or long screwdriver. Place the probe on each rocker arm or valve cover directly above each lifter position. Note which cylinder produces the loudest tick.
Hydraulic lifter noise has characteristic qualities:
- Sharp metallic tick (not a dull thud)
- Rhythmic, tied to valve events
- Loudest at idle, may fade slightly as RPM rises
- Does not change with engine load (unlike rod knock)
Step 2: Cylinder Cancellation Test
With the engine idling, short each spark plug wire to ground one at a time using insulated pliers. When you ground the wire for the cylinder with the bad lifter, the noise should change or stop. This confirms the affected location.
Step 3: Bleed-Down Test
Remove the suspected lifter. Submerge it in clean diesel fuel or penetrating oil. Pump the plunger several times to purge air. Then pump it once fully and start a stopwatch.
Measure the time until the plunger moves inward visibly:
| Bleed-Down Time | Condition | Action |
|---|---|---|
20+ seconds |
Good |
Reinstall, monitor |
5-20 seconds |
Marginal |
Clean and retest |
0-5 seconds |
Failed |
Repair or replace |
Step 4: Visual Inspection
Disassemble the lifter if your facility has the capability. Look for:
- Vertical scoring on the plunger surface
- Pitting or corrosion on the check ball seat
- Debris is packed in the oil passage
- Discoloration from overheating
This inspection determines whether hydraulic lifter repair is feasible or if you need new parts.
Repair Techniques
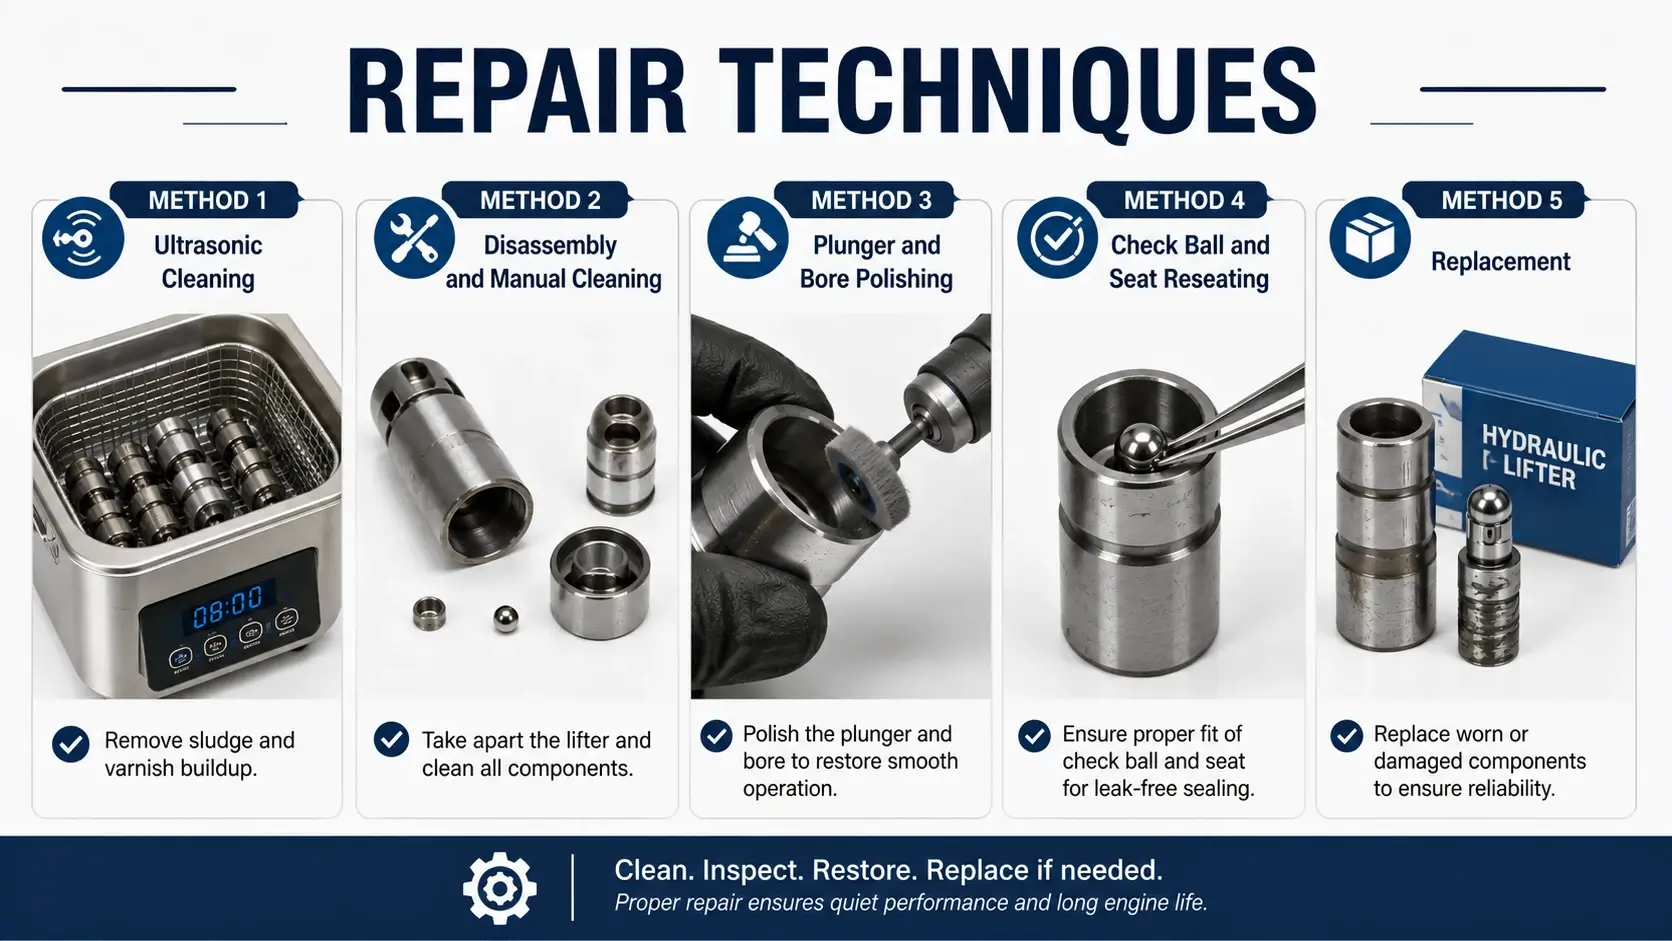
Not every faulty lifter requires replacement. Several repair methods exist, depending on the failure mode and your shop’s capabilities.
Method 1: Ultrasonic Cleaning
For lifters stuck with varnish or light contamination. Place lifters in an ultrasonic cleaner with a solvent designed for carbon removal. Run cycles of 15 to 20 minutes. Agitate manually between cycles.
Success rate: 60 to 75 percent for varnish-related sticking. Cost per lifter: 5 to 15 in consumables. Time: 2 to 4 hours, including removal and reinstall.
This method represents the lowest-cost form of hydraulic lifter repair. It works best when the root cause is soft deposits rather than mechanical damage.
Method 2: Disassembly and Manual Cleaning
More thorough than ultrasonic alone. Requires a lifter disassembly fixture (available from specialty tool suppliers) and careful handling of small parts.
Procedure:
- Secure the lifter body in the fixture
- Compress the plunger and remove the retaining clip
- Extract the plunger, spring, and check ball
- Inspect each part under magnification
- Clean all surfaces with solvent and a soft brass brush
- Remove stubborn deposits with a fine nylon brush
- Reassemble with clean engine oil
Warning: Some lifters use a crimped body that cannot be safely disassembled. Forcing these units destroys them. Identify the construction type before attempting disassembly.
Method 3: Plunger and Bore Polishing
When light scoring exists but dimensions remain within tolerance, polishing can restore function. Use a honing mandrel sized to the lifter bore. Apply fine compound (320 grit then 600 grit). Polish with short strokes. Check fit frequently.
Target clearance after polishing: 0.0005 to 0.001 inches (0.013 to 0.025 mm). Exceeding this range means too much metal has been removed. The lifter will never hold pressure properly.
This technique requires skill and measurement equipment. It extends the repair scope into cases that would otherwise require replacement.
Method 4: Check Ball and Seat Reseating
If the check ball leaks because of a damaged seat, reseating sometimes works. Use a small hardened steel ball slightly larger than the original. Tap it gently into the seat with a drift punch. This cold works the metal and creates a new sealing surface.
Remove burrs afterward. Install a new check ball (always replace, never reuse the old one). Test bleed-down again.
Success rate varies. Soft seats respond well. Hardened seats that have cracked or spalled do not. Attempt this only when replacement lifters are unavailable or cost-prohibitive.
Method 5: Replacement
When repair fails or damage exceeds limits, install new lifters. Always replace the full set on the affected bank. Mixing old and new lifters causes uneven wear patterns. The new lifters have different leak-down rates than the worn ones. Cam lobe wear accelerates on cylinders with mismatched lifters.
Break-in procedure for new lifters:
- Use break-in oil with ZDDP additive (minimum 1200 ppm phosphorus)
- Idle at 1500 to 2000 RPM for 20 to 30 minutes
- Vary RPM occasionally during break-in
- Change oil and filter after the first hour of operation
- Switch to regular oil with appropriate viscosity
Application-Specific Considerations
Different applications demand different approaches to hydraulic lifter repair.
Automotive Gasoline Engines
Passenger car lifters are typically non-serviceable. Manufacturers crimp or press the bodies closed. Cleaning helps if the cause is varnish. Mechanical repair rarely makes economic sense given the low cost of aftermarket replacements (15 to 50 each).
Exception: High-performance and racing lifters often use serviceable designs. These justify repair costs that would be uneconomical for stock lifters.
Diesel Engines
Diesel lifters handle higher loads and pressures. They cost more (50 to 200 each) and have more robust construction. Many diesel lifters can be disassembled and repaired. The economics favor repair over replacement when possible.
Common diesel applications with serviceable lifters:
- Cummins B-series and IS-series
- Detroit Diesel Series 60
- Caterpillar C12 and C15
- Navistar T444E and VT365
Heavy Equipment and Industrial
Industrial engines may run for 10,000+ hours between overhauls. Lifter condition affects uptime significantly. Many fleets maintain rebuilt lifter inventory. They clean, inspect, and refurbish lifters during scheduled downtime.
Industrial repair programs include:
- Batch ultrasonic cleaning
- Dimensional inspection with go/no-go gauges
- Selective assembly of matched plungers and bodies
- Pre-lubrication and packaging for storage
Cost Analysis
| Service Type | Per-Lifter Cost | Typical Job Total |
|---|---|---|
Diagnostic only |
50-150 |
50-300 |
Ultrasonic cleaning |
5-15 |
80-240 (full set) |
Disassembly + cleaning |
15-30 |
240-480 (full set) |
Polishing / reseating |
25-50 |
400-800 (full set) |
New lifters (parts + labor) |
50-150 each |
800-2,000 (V8, full set) |
Heavy equipment and diesel costs run two to three times higher. Industrial engine lifter sets can exceed $5,000 for a complete replacement.
The decision matrix for hydraulic lifter repair vs. replacement depends on:
- Engine value and remaining service life
- Availability and lead time for new parts
- Shop capability and equipment
- Customer budget and downtime tolerance
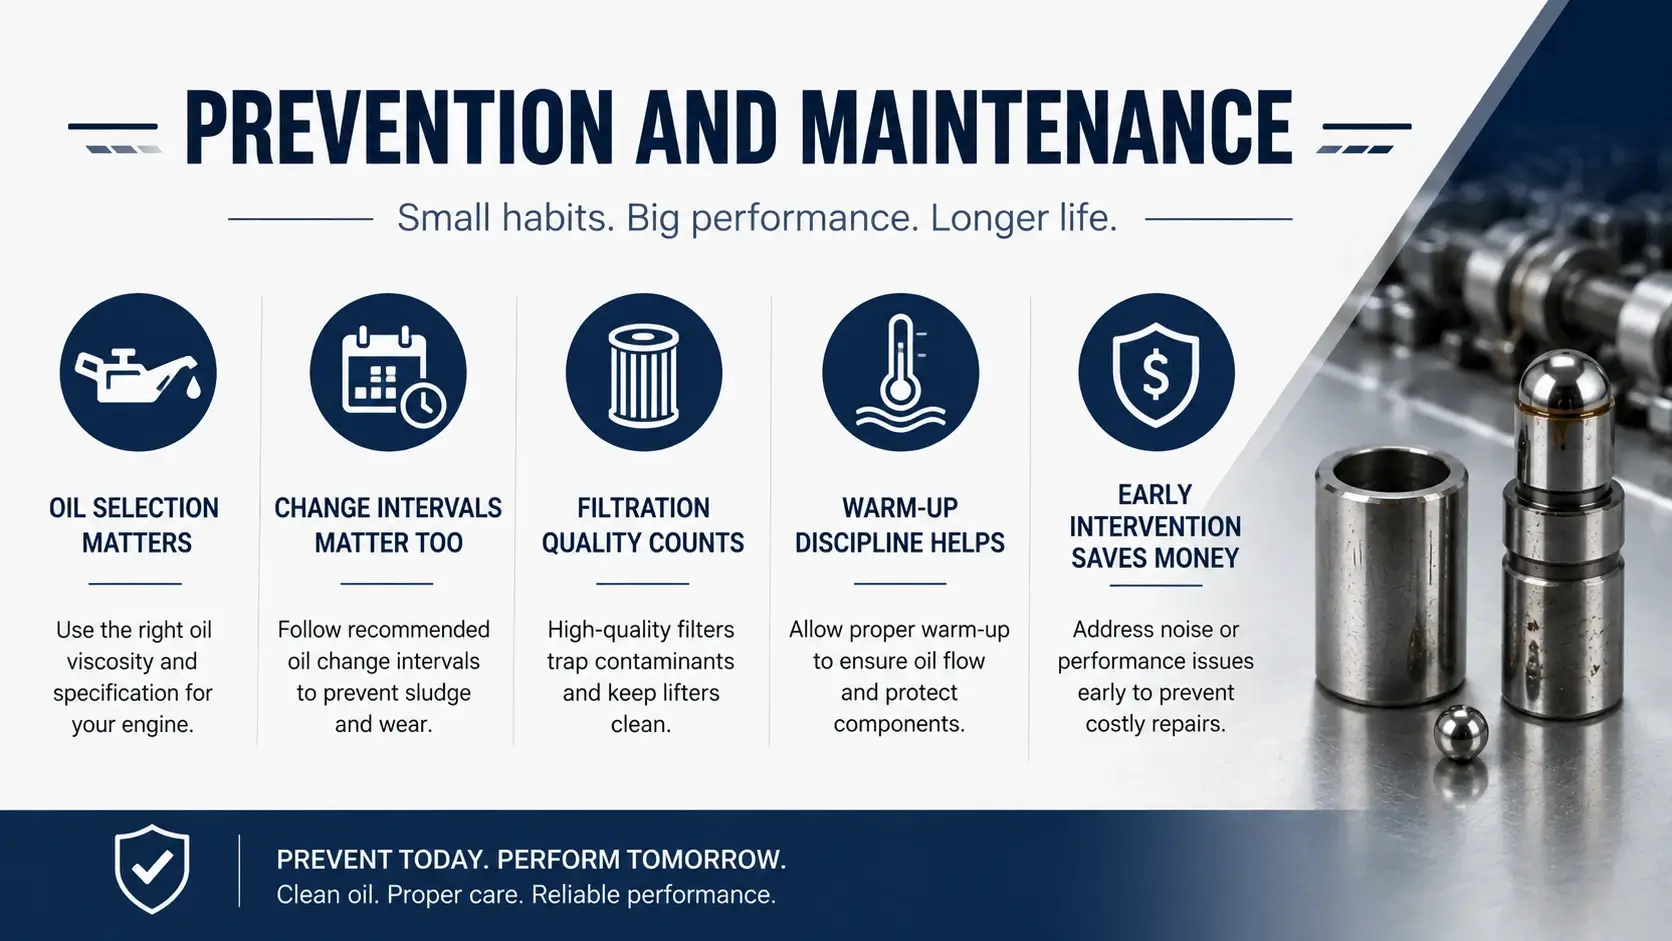
Prevention and Maintenance