
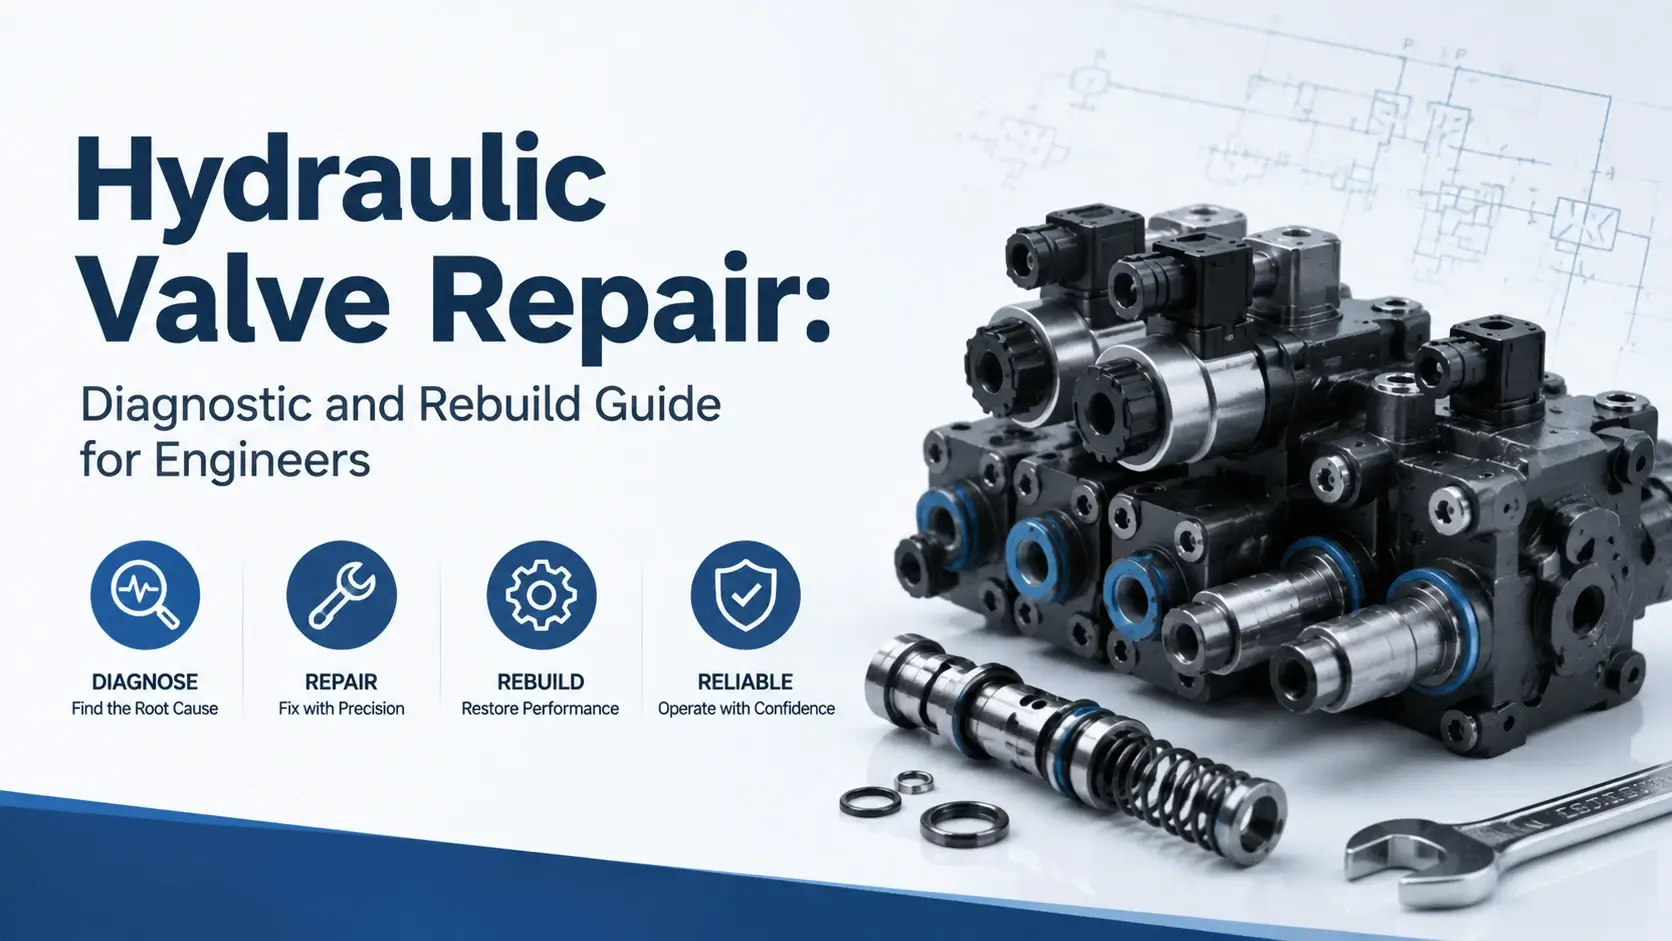
Introduction
Hydraulic valves fail. They fail from contamination, cavitation, fatigue, and plain wear. When one fails, you face three choices: repair, rebuild, or replace. This guide fills the gap between field troubleshooting and a factory reman.
We cover the three valve families that dominate industrial and mobile systems: directional, pressure, and check. Each has its own failure signature and repair procedure. Real numbers follow: spool clearances, seat flatness targets, spring specs, and ISO 4406 cleanliness for restart.
A hydraulic valve repair fails when you skip diagnosis and just swap seals. The same valve fails again six weeks later because the root cause never left. We start with diagnosis, then teardown, then rebuild, then test. That order matters.
When to Repair vs Replace a Hydraulic Valve
Not every failed valve deserves a rebuild. The decision hinges on parts cost, labor hours, downtime pressure, and body condition. A valve with a cracked body or scored spool bore goes to scrap. A valve with tired seals and a slightly worn spool earns a second life.
Use this framework before you commit to shop hours:
| Signal | Action |
|---|---|
Body cracked, corroded, or warped |
Replace |
Spool bore scored beyond spec |
Replace |
Spool galled or chipped at lands |
Replace spool, evaluate body |
Seat lightly scored |
Rebuild after lapping |
Seals, springs, and detents tired |
Rebuild |
Contamination damage, body sound |
Flush, rebuild, fix the source |
Valve under 5 years old with low hours |
Rebuild |
Valve over 12 years, parts scarce |
Replace |
Labor cost drives the call. A shop rebuild of a mid-size directional valve runs 4 to 10 hours. Good hydraulic valve repair economics demand you weigh parts against a new valve. If parts exceed 60 percent of a new valve price, replace. If downtime cost outpaces rebuild lead time, buy new and rebuild the old as a spare.
Common Hydraulic Valve Failure Modes
Most valve failures trace back to four root causes. Contamination leads the list. Cavitation, aeration, and fatigue follow. Rarely does a valve fail from a single event. Most failures combine two or three causes that compound over weeks.
The table below maps symptoms to root causes and to the repair scope each one triggers. Use it as a first-pass filter before you open the valve.
| Symptom | Likely root cause | Repair scope |
|---|---|---|
Spool sticks in one position |
Contamination or varnish |
Flush, lap spool, change oil |
Cylinder drifts under load |
Cross-port leakage from spool wear |
Replace spool and body as set |
Pressure drops at relief |
Poppet seat scored or spring weak |
Lap seat, replace spring |
Valve chatters or squeals |
Cavitation or air in pilot line |
Fix inlet, bleed air, lap seat |
External leak at spool end |
Shaft seal failure |
Replace seal, check spool journal |
Solenoid hums, valve will not shift |
Solenoid burnout or stuck spool |
Test coil, free spool, flush |
Sudden catastrophic failure |
Contamination shock |
Replace, flush system, find source |
Gradual response lag over weeks |
Wear or oil degradation |
Rebuild, change oil, analyze oil |
Internal leakage tells you more than any single symptom. Measure it at rated flow and pressure. Compare against the valve’s rated leakage, usually under 5 percent of nominal flow for a healthy spool valve. Anything above 10 percent means internal wear has crossed the rebuild line.
Diagnostic Procedure: Testing Before You Tear Down
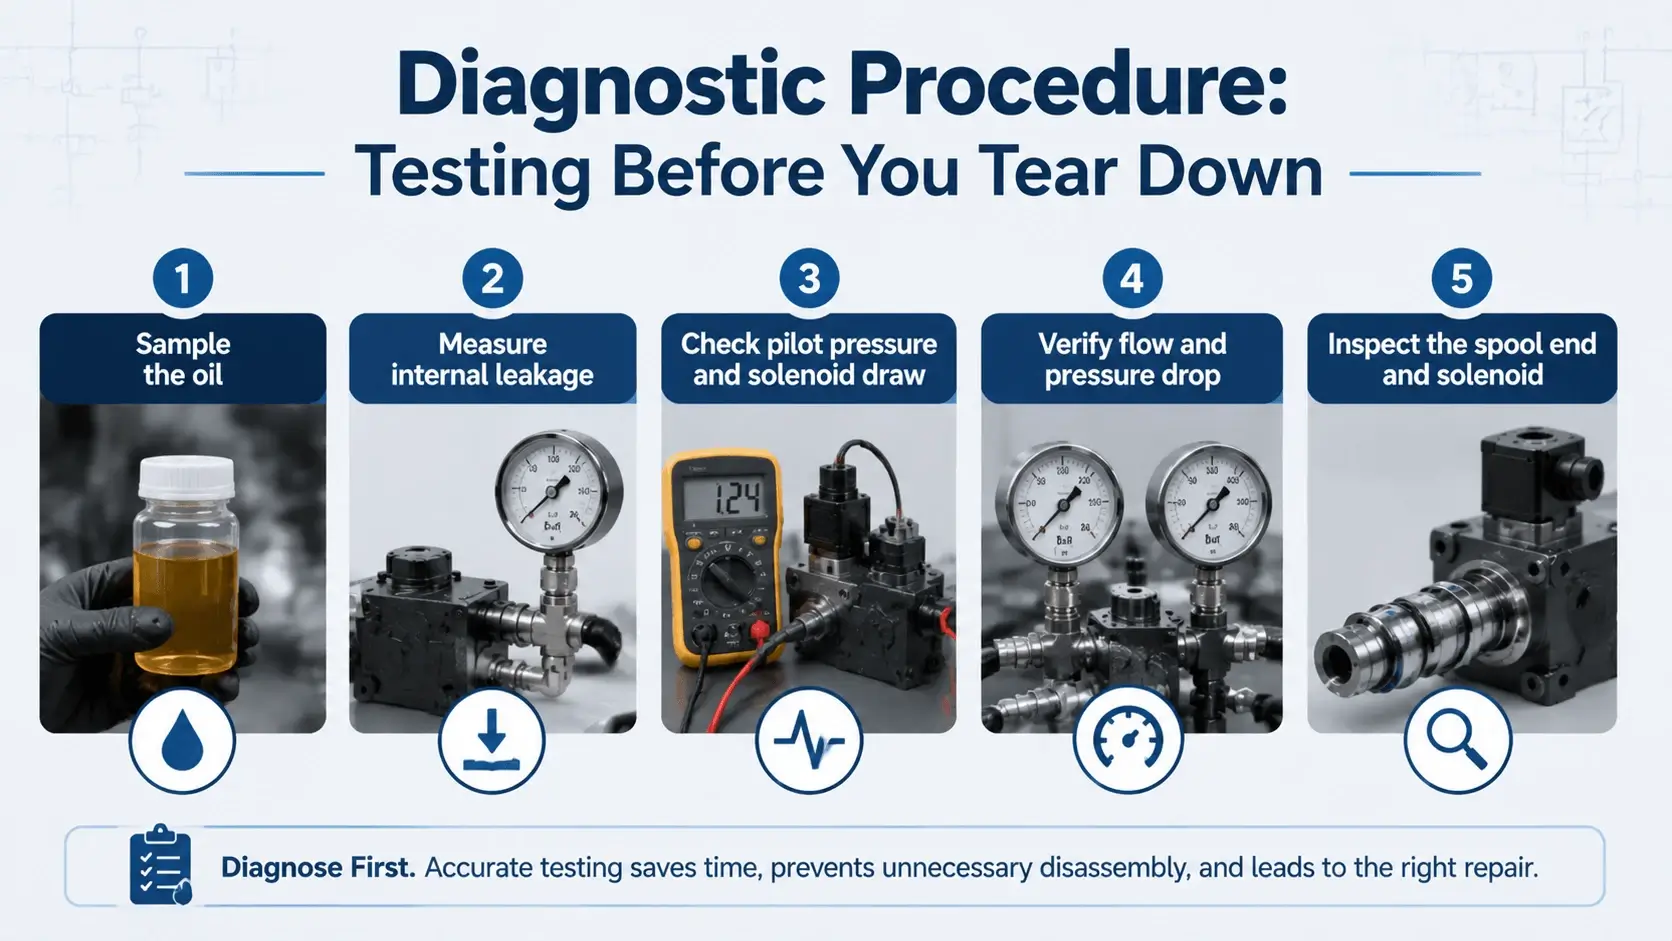
Diagnosis before teardown. Tearing down a valve before you test it destroys evidence. The contaminant that killed the valve sits in the return line oil. The flow reading at the test port tells you which section lost efficiency. Skip the tests and you rebuild blind.
Step 1: Sample the oil
Pull a sample from the return line while the system runs. Send it to a lab for particle count, water content, and metal wear analysis. High silicon means ingressed dust. High iron means spool or body wear. High copper means bearing or bushing wear.
Step 2: Measure internal leakage
Plumb a flow meter across the work ports with the valve centered. Run the pump at rated speed and full relief pressure. A healthy spool valve shows cross-port leakage under 5 percent of nominal flow. Readings above 10 percent mean the spool and bore wear past service limits.
Step 3: Check pilot pressure and solenoid draw
Measure pilot pressure at the pilot port for pilot-operated valves. A reading below spec means the pilot circuit leaks or the pump starves. For solenoid valves, check coil current. A high draw means the coil runs hot or the spool drags.
Step 4: Verify flow and pressure drop
Tee in a pressure gauge across the inlet and outlet. Compare against nameplate. If pressure drop exceeds spec at rated flow, the metering notches wear or the spool sits off-center. Both point to internal wear.
Step 5: Inspect the spool end and solenoid
Check for external leaks at the spool end caps and solenoid junctions. Oil there means the static seals failed. Listen for solenoid chatter. A chattering solenoid means low voltage or a sticking spool.
Directional Spool Valve Repair
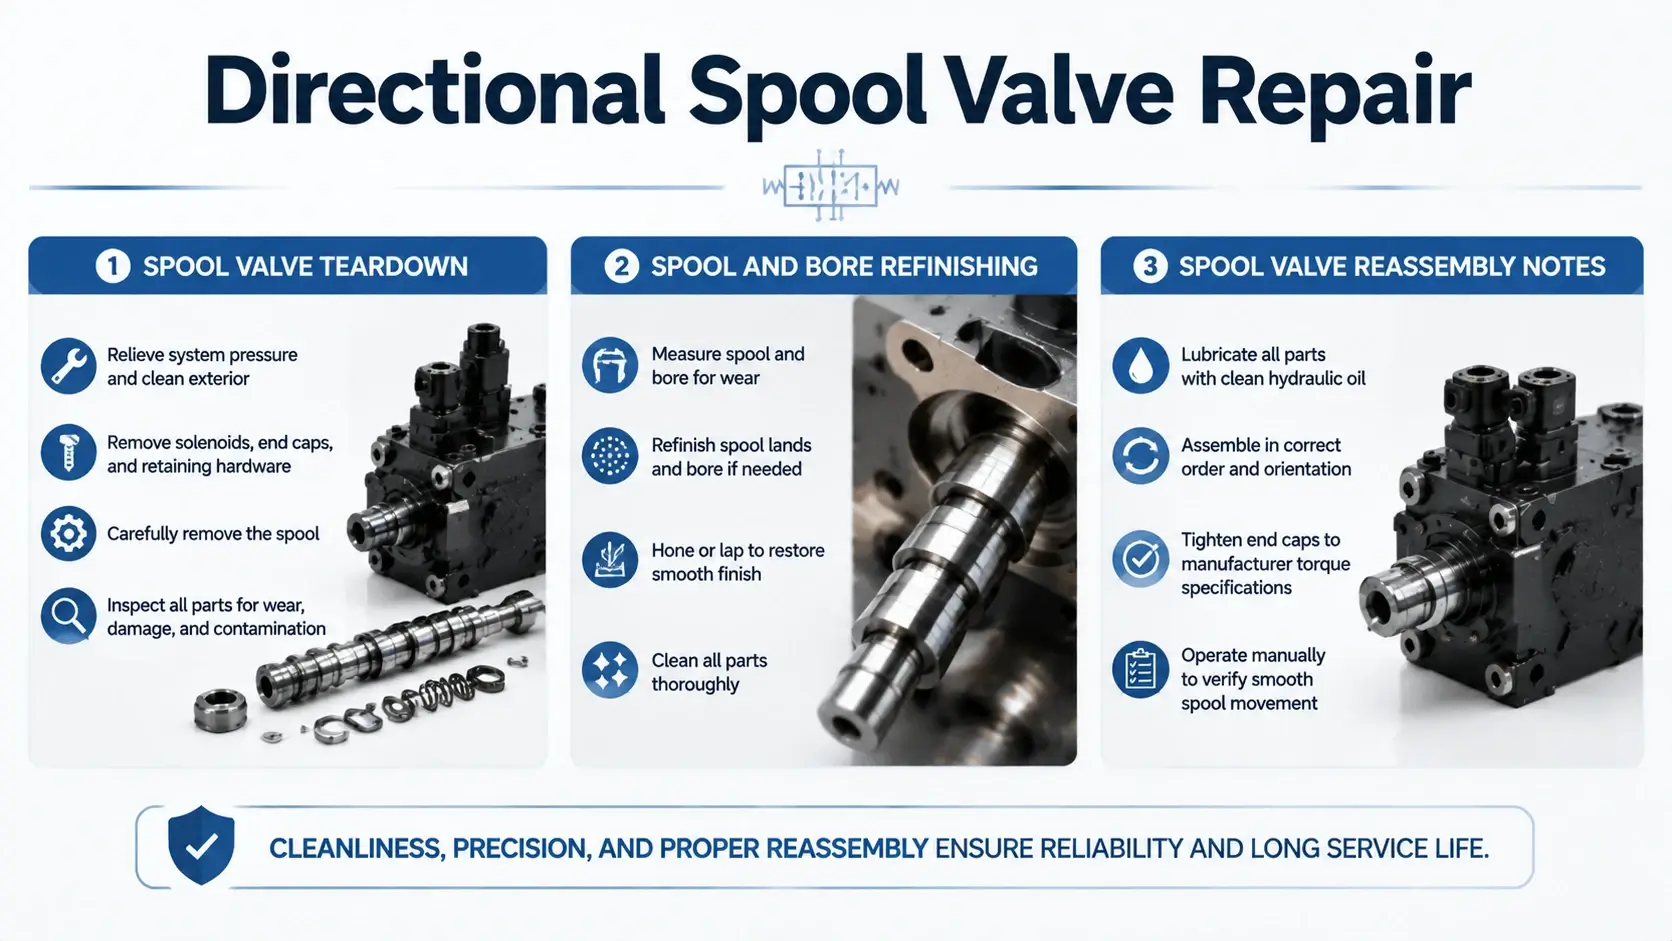
Directional valves reward careful teardown and punish careless reassembly. Their internal clearances run tight. A single speck of dirt on a spool land restarts the failure cycle. Plan the rebuild on a clean bench with clean tools and clean oil.
Spool valve teardown
Drain the valve and remove the end caps. Withdraw the spool with a plastic or brass rod. Never drive the spool out with steel. Steel scores the bore and ruins the body. Mark the spool orientation so it goes back the same way.
Inspect the spool lands for scoring, transfer marks, and edge wear. Scored lands mean contamination passed through. Transfer marks mean the spool flexed under pressure and touched the bore. Both conditions wear the bore.
Measure spool-to-bore clearance with a bore gauge and an outside micrometer. Most industrial spool valves run 5 to 12 microns clearance new. Anything above 20 microns means the spool and bore both need replacement, not just seals.
Spool and bore refinishing
Lap a lightly scored spool on a honing plate. Use 3 to 5 micron diamond paste. Work in a figure-eight pattern and rotate the spool every few strokes. Stop when the lands show uniform finish. Measure roundness with a micrometer. Target under 2 microns taper.
A scored bore needs honing, not lapping. Honing removes metal and opens the clearance. If honing takes the bore past the oversize spool class, you need a new body. Most manufacturers sell oversize spools for one hone cut, then the body retires.
Spool valve reassembly notes
Lubricate the spool with clean system oil before you install it. The spool should slide into the bore under finger pressure. If it binds, stop. Binding means a burr, contamination, or a distorted body. Find the cause before you force it.
Install new end cap seals every rebuild. Torque the end caps in a cross pattern. Use a calibrated torque wrench, not a feel. Run the valve at no load for the first ten cycles. Watch for smooth shift and full travel.
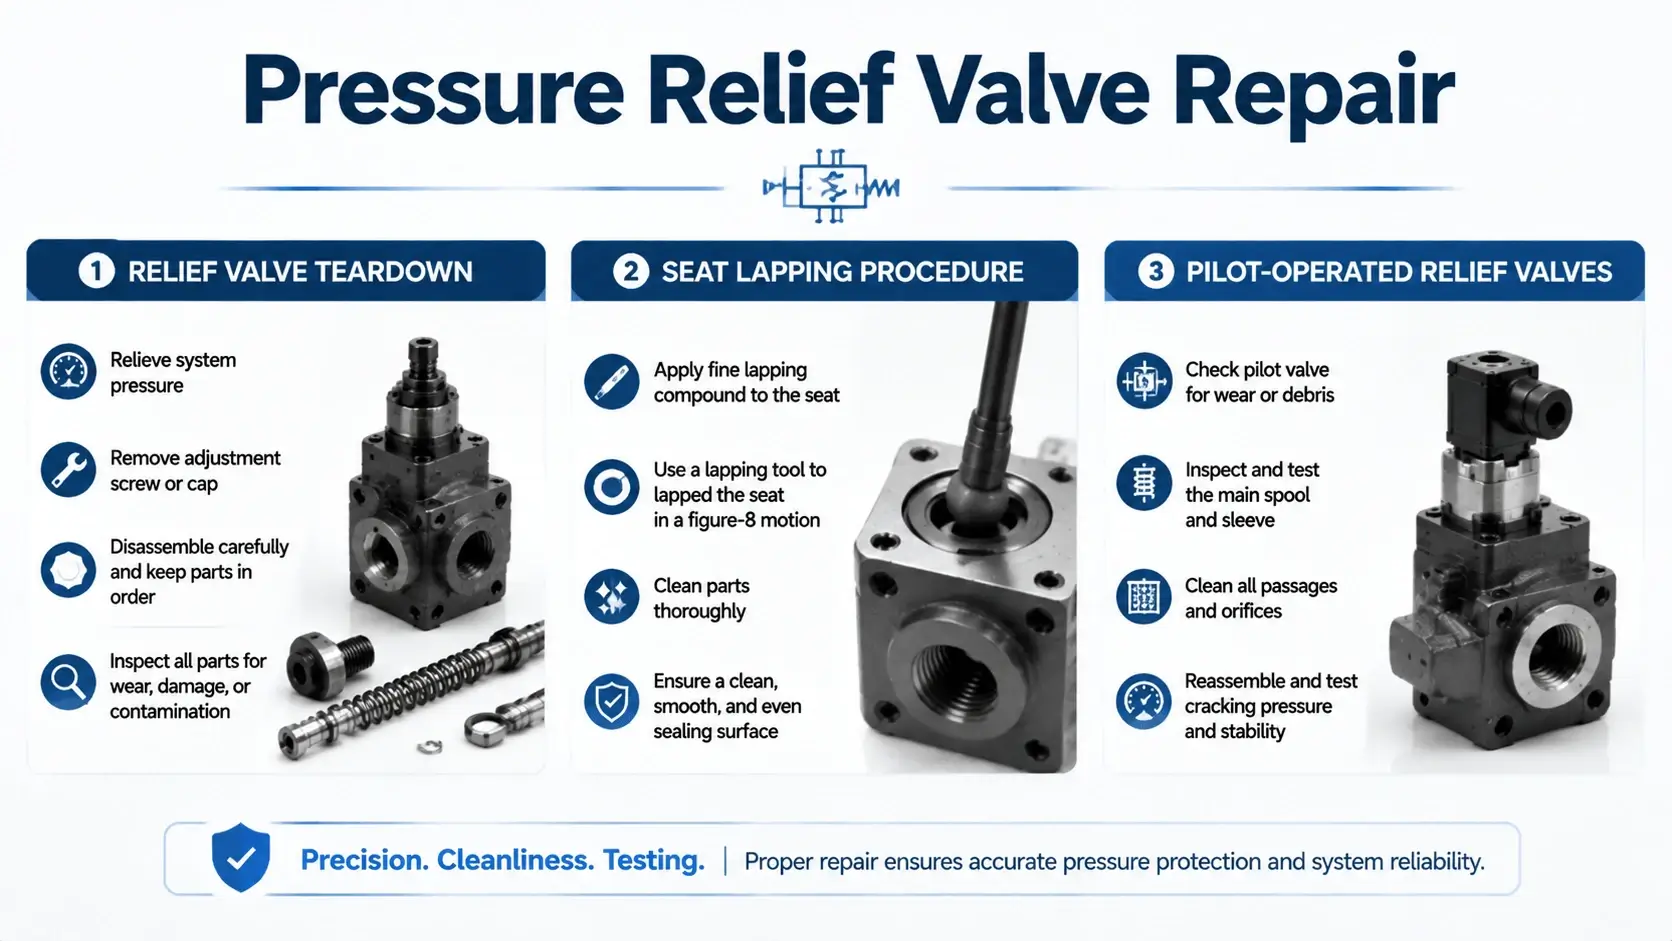
Relief valves fail differently from directional valves. The poppet and seat do the sealing. Springs set the pressure. A relief valve that drifts or chatters usually has a seat problem or a spring problem, not a body problem.
Relief valve teardown
Remove the adjusting cap and withdraw the spring. Pull the poppet or ball. Inspect the seat for scoring, pitting, and erosion. A scored seat leaks at crack pressure. A pitted seat chatters under flow.
Check the spring free length against the spec sheet. A spring that lost 5 percent of its free length has fatigued and will not hold pressure. Replace fatigued springs. Do not shim a tired spring. Shimming raises crack pressure but does not fix the fatigue rate.
Seat lapping procedure
Lap a lightly scored seat with a brass or cast-iron lap. Use a 5 to 10 micron compound. Work in small circles and lift the lap off the seat every few turns. Never spin the lap in one place. A spun lap cuts a groove.
Check seat flatness with a Prussian blue transfer or a dial indicator on a surface plate. Target flatness under 0.005 mm. A deep score past 0.05 mm means you need to machine the seat, not lap it. Machined seats need a new angle cut and a light lap to finish.
Pilot-operated relief valves
Pilot-operated reliefs add a pilot poppet and a main stage. The pilot stage cracks first and vents the main stage. A pilot-operated relief that will not hold pressure often has a dirty pilot stage. Disassemble the pilot, clean every passage, and lap the pilot seat.
Check the main stage piston for free travel. A piston that sticks in the open position dumps full flow to the tank. Clean the piston bore and replace the piston seal. The piston should fall under its own weight when you hold the body vertical.
Check Valve Repair
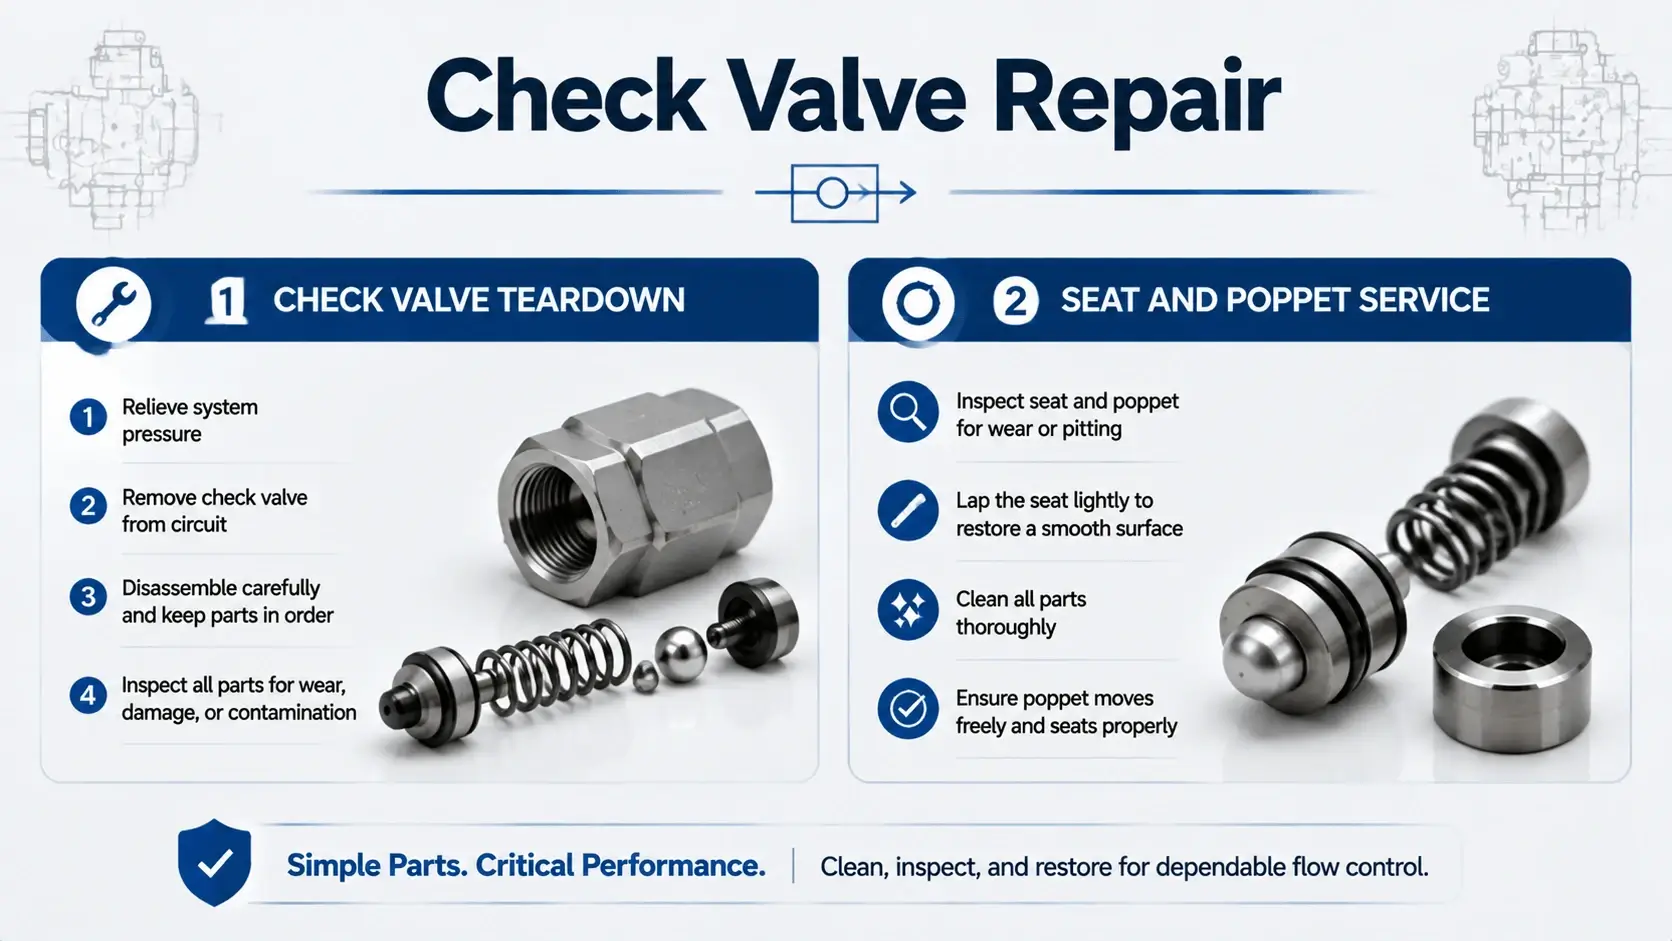
Check valves look simple but fail often. They see flow shock every cycle. The poppet slams the seat thousands of times an hour. Seat wear and spring fatigue lead the failure list.
Check valve teardown
Remove the cap and withdraw the spring and poppet. Inspect the poppet face for wear and the seat for scoring. A worn poppet face leaks in the reverse direction. A scored seat leaks the same way.
Check the spring free length. Check valves run on light springs, so fatigue shows fast. A spring 10 percent short of spec means replace it. Match the new spring rate to the crack pressure you need.
Seat and poppet service
Lap the seat with a brass lap and 5 micron compound. Check the poppet face for flatness. A dished poppet face needs replacement. Never lap a poppet face flat on a hard seat. The angles differ, and the seal fails.
Reassemble with a new spring and a cleaned poppet. Test the crack pressure on a bench. A check valve that cracks too low lets the actuator drift. One that cracks too high starves the circuit.
Critical Repair Tasks
Three repair tasks separate a good rebuild from a repeat failure. Every hydraulic valve repair hinges on these steps. Get them wrong and the valve comes back in weeks, not years.
Seal and O-ring replacement
Replace every seal on any rebuild, no exceptions. Seals harden, compress, and take a set over time. A seal that looks fine often leaks under pressure. Buy the seal kit for your valve size and use all of it.
Lubricate each seal with clean system oil before you install it. A dry seal rolls, cuts, or extrudes on the first cycle. Inspect the seal grooves for burrs and contamination. A burr in a groove slices the new seal on installation.
Spring replacement and setting
Springs set the pressure in relief, reducing, and check valves. Replace any spring that has lost free length or shows surface rust. A rusted spring has fatigue cracks you cannot see. Set the new spring to the crack pressure on a bench, not in the machine.
Use the adjusting screw to set pressure after you install the spring. Turn the screw in to raise pressure, out to lower it. Run the valve through three full cycles before you lock the jam nut. The pressure should sit within 2 percent of the setpoint on the third cycle.
Spool and seat cleaning
Clean every passage with solvent and compressed air. Flush the body in an ultrasonic bath if you have one. A passage plugged with varnish or debris starves a section of the valve. Starved sections stick or fail to shift.
Blow through every port with shop air. Listen for restrictions. A restricted port means a passage still holds debris. Clean it again before you reassemble.
Post-Repair Testing and Commissioning
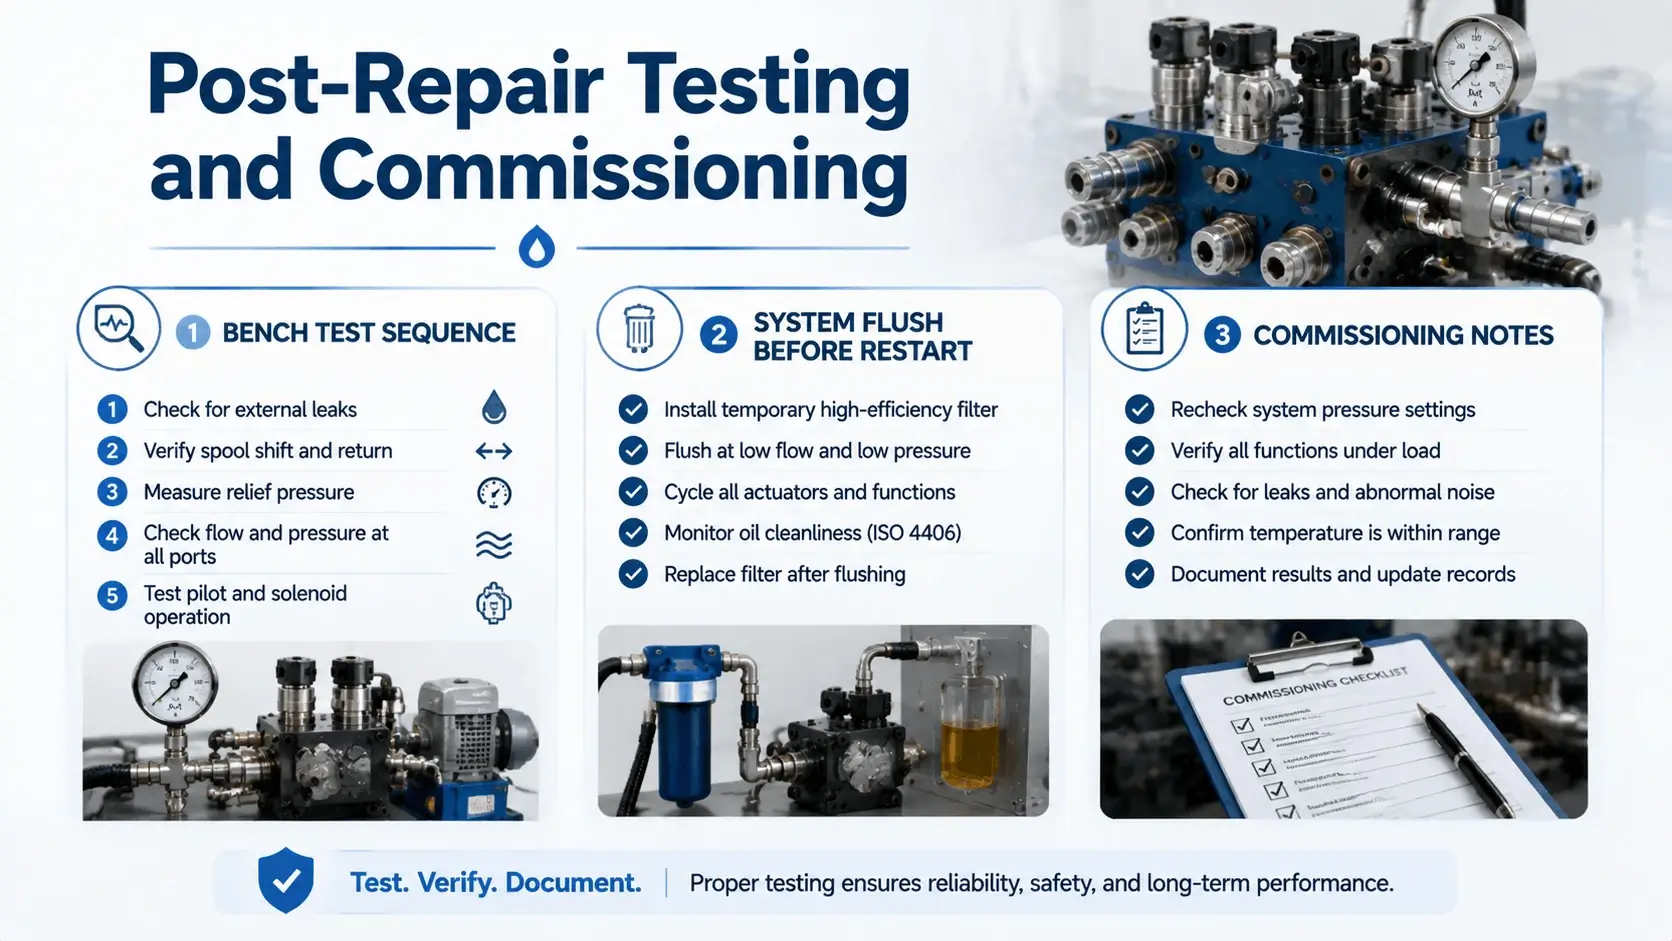
A rebuilt valve earns its keep on the test stand, not in the machine. No hydraulic valve repair is complete without a bench test. Skip it and you ship a valve that may fail on startup. The bench test catches assembly errors, wrong settings, and missed contamination before they cost a second teardown.
Bench test sequence
Fill the valve with filtered oil at ISO 4406 18/16/13 or cleaner. Run the valve at no load for ten cycles. Watch for smooth shift and full travel. A valve that hangs or skips needs a teardown before it goes further.
Bring pressure up in steps. Hold 25 percent of the rated pressure for two minutes. Hold 50 percent for two minutes. Hold 75 percent for two minutes. Then run at full rated pressure for ten minutes.
Measure internal leakage at full pressure. Compare against the spec. A rebuilt valve should land within 15 percent of the new valve leakage value. Higher leakage means you missed wear on a critical surface.
System flush before restart
Flush the system before you bolt the rebuilt valve on. A valve killed by contamination will die again in the same system. Run a flush rig at high velocity through every line. Target ISO 4406 16/14/11 for servo and proportional systems, 18/16/13 for standard valves.
Change every filter after the flush. A filter that sat through the failure holds the contaminant that caused it. New valve, old filter, same death.
Commissioning notes
Start the valve at low pressure. Shift it through every position ten times. Check for leaks at every fitting and seal. Listen for chatter or squeal.
Bring pressure up in steps over the next hour. Watch the oil temperature. If the temperature rises above 65°C, stop and find the heat source. Heat kills oil, and oil kills valves.
Common Repair Mistakes to Avoid
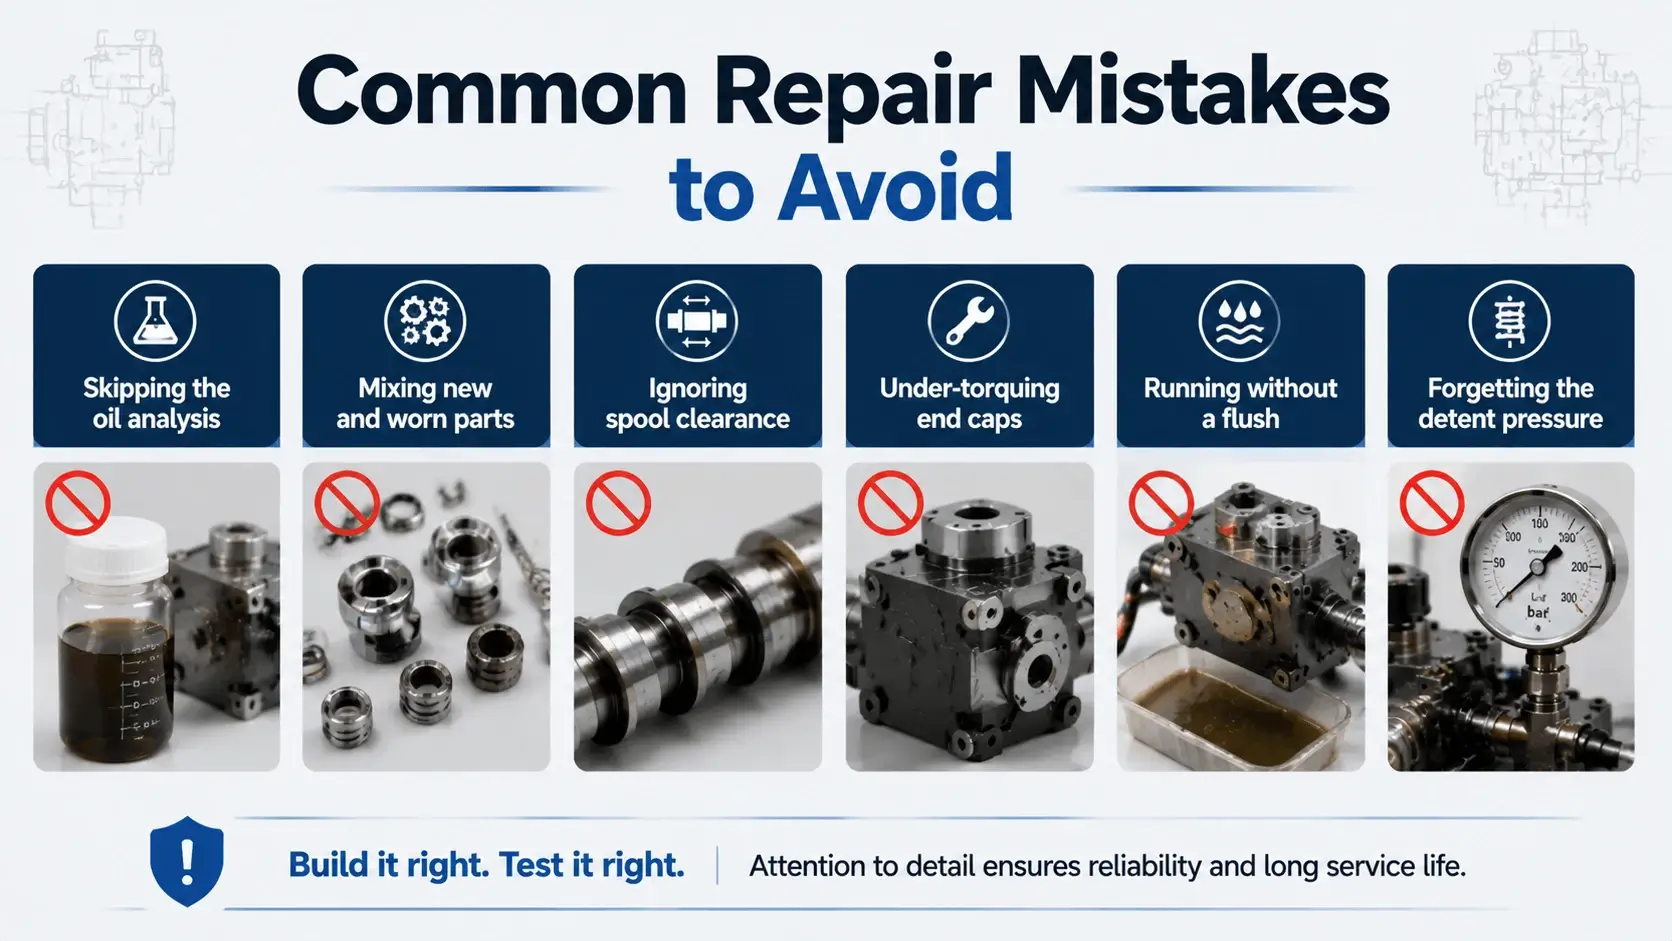
Most repeat valve failures trace back to the same mistakes. Avoid these and your rebuild lasts.
Skipping the oil analysis
You rebuild the valve, drop it back in the same system, and watch it fail again. The contaminant that killed it still lives in the reservoir. Sample the oil first.
Mixing new and worn parts
A new spool against a worn bore, or new seals against a scored journal, dooms the rebuild. Parts wear as sets. Replace them as sets.
Ignoring spool clearance
A spool with 25 microns clearance leaks past the rebuild line. Check clearance before you press new seals in.
Under-torquing end caps
End caps hold the preload and seal the body. A loose cap lets the body flex and the spool walk. Use a torque wrench and follow the cross pattern.
Running without a flush
The rebuilt valve sees the same dirty oil that killed the old one. Flush the system, change the filters, and refill with clean oil.
Forgetting the detent pressure
Detents hold the spool in position. A detent set too weak lets the spool drift. One set too strong shocks the solenoid on shift. Set detent pressure to spec.
Preventive Maintenance After Repair
A rebuilt valve lasts as long as the maintenance program that follows it. Skip the program, and you rebuild again next year.
Sample the oil every 500 hours or quarterly, whichever comes first. Watch the particle count trend. A rising ISO code means the contamination source returns. Find it before the valve does.
Change the filters on schedule, not on pressure drop. A filter that waits for the bypass indicator has already let particles through. Set a calendar interval and stick to it.
Monitor internal leakage monthly. Trend the value against the baseline you set after the rebuild. A 50 percent rise over baseline means wear resumes. Plan the next rebuild before the valve fails.
Check solenoid temperature weekly with an infrared gun. A hot solenoid means the coil runs at high current or the spool drags. Catch it early, and you save the coil and the valve.
Inspect the coupling and pilot lines quarterly. Vibration settles the foundation and loosens fittings. A loose pilot line drops pilot pressure, and the valve stops shifting.
FAQ
How much does hydraulic valve repair cost?
Cost depends on valve size, type, and damage scope. A small check valve rebuild runs 80 to 250 in parts and labor. A mid-size directional valve rebuild runs 400 to 1,500. A large proportional or servo valve can hit $4,000 or more. Parts drive 40 to 60 percent of the bill. Labor drives the rest. Compare the rebuild quote against a new valve price. If parts exceed 60 percent of new, replace.
How long does a hydraulic valve rebuild take?
A typical shop rebuild runs 3 to 8 working days. Check and relief valves land at the short end. Directional and proportional valves land at the long end because of teardown, lapping, and bench test time. Add 2 to 4 days if you need parts not in stock. Add a week if the body needs machining. A factory reman usually ships faster than a custom shop rebuild.
Can you repair a hydraulic valve yourself?
You can repair a check or relief valve in a well-equipped shop if you have clean conditions, a press, dial indicators, and a torque wrench. Directional valve repair needs more: a honing plate for spool work, bore gauges for clearance checks, and a test stand for commissioning. Skip the test stand, and you ship an unproven valve. Most shops that try hydraulic valve repair without proper tooling send the valve out the second time.
What causes a hydraulic valve to fail prematurely?
Contamination leads to every study of valve failure. Dirt ingested through a bad breather, a kinked return line, or a loose fitting enters the valve and scores every running surface. Cavitation follows. A restricted inlet starves the valve and collapses vapor bubbles that hammer the seat. Aeration comes third. Air in the oil compresses and heats, accelerating oil breakdown. Fatigue and misalignment round out the top causes.
How do I know if my hydraulic valve is bad?
Watch for five signs: cylinder drift, sticking spool, pressure drop, external leak, and chatter. Confirm with a cross-port leakage test and a pressure-drop check at rated flow. Internal leakage above 10 percent of nominal on a spool valve means internal wear crossed the line. Pressure drop more than 15 percent above spec at rated flow means the metering edges wear. Either reading means rebuild or replace.
Conclusion
Hydraulic valve repair works when you diagnose before teardown, decide rebuild or replace with real numbers, and execute with fit and finish targets. It fails when you swap seals and skip the root cause. The valve comes back in weeks.
The discipline separates shops that rebuild valves from shops that replace valves. Measure internal leakage. Sample the oil. Lap the seat to flatness. Set spring pressure to spec. Flush the system before restarting. Bench test before you ship. Trend the leakage after the rebuild. Each step adds months to the valve’s next life.
If you want a deeper resource on the failure side, pair this guide with our hydraulic system flushing article and our cleaning hydraulic fluid guide. The valve dies when the system kills it. Fix the system, and the valve stays fixed.